


Hello - here's a little tutorial for a fun spinner card using Deena Rutter’s new Wheel O’Fortunate Cutting Files. But good news – if you don’t have a cutting machine you can still use these files to make this card!
This card is of moderate difficulty.
What you’ll need…
- Digital kit - Deena Rutter’s Wheel O’Fortunate Cutting Files
- Scissors, craft knife, and/or a paper trimmer, as well as a thumbtack, awl or paper piercing tool
- Circle craft punch, I used a 3/4″ in punch
- Adhesive & dimensionals or pop dots
- Various embellishments
- A small brad
Instructions:
1) Set up your files.
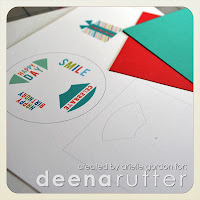
- Using the Wheel O’ Fortunate files, open both the “wheel” file and the “wheel with window”, layer them on top of one another and resize them, so they both stay the same size.
- Noting the size of your wheels, create an outline of a box that is 1/4″ larger & overlay it on the wheels – leave equal space on all sides. Also place a visible dot in the exact center of your box.
- Copy and paste the “window” from your “wheel with window” onto your box, and then delete the “wheel with window” layer. The box layer will be the top layer of your card.
- Set up the phrases on your wheel. It’s easier to do this while it’s sandwiched with the “window” layer so you can line them up.
- Once you have set these up, move the layers so that you can print them out. I managed to print mine all on the same sheet of paper, along with my “embellishment” that would cover my brad on the front of the card.
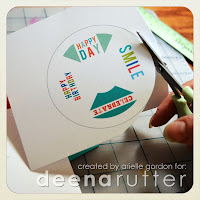
2) Print your images. I used a thick card stock, which makes a durable card that I think works better.
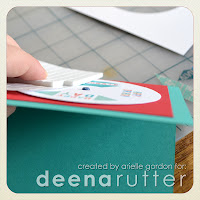
3) Cut out the wheel, and the box. Trim out the window with a craft knife or small scissors. If there is a small raised lip around your cuts, just use a fingernail and gently rub it over to smooth it down.
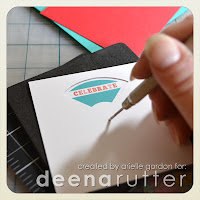
4) Line up the box with the window with your wheel (make sure the wheel is centered) and pierce the hole that you placed in the center of the box.
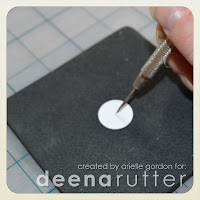
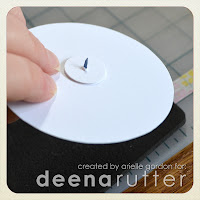
5) Punch 2 circles out of your extra cardstock. (These will help your card spin.) Line them up and pierce them.
6) Place your brad through the hole in your wheel, the head of the brad in the front, and add the 2 discs to the back and set aside.
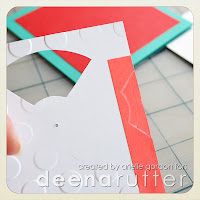
7) You need a “notch” in your box layer (the one with the window) on the side in order to turn your wheel. I traced the bottom of the window onto a sticky note, placed it on the side and trimmed it out. You could also use a circle punch. But the notch needs to be shallow enough so that your images don’t show as you spin the wheel.
8) Make your card base – mine is 4 1/4″ square. Cut a contrasting piece of card stock as a mat that is 1/4″ larger on each side that your box layer. Paste it onto your card base.
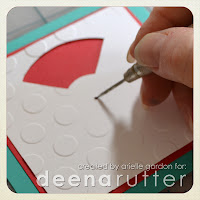
9) Center your box layer on top of your mat and pierce through the hole and the card layers.
10) Remove the box layer and add your wheel onto the card base and secure with the brad.
11) Find some dimensional adhesive foam or pop dots that are equal to or a little thicker than the thickness of your card/brad.
12) Place the adhesive on the corners around your wheel, leaving enough space from the edges so that they don’t peek out.
13) Adhere the box layer to the top of the card. Add an element of some type to cover the hole in the center of that layer and embellish your card.
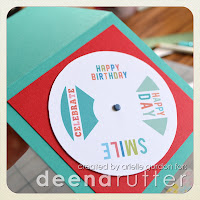
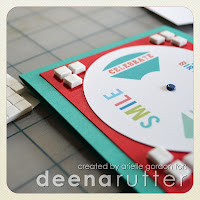
And here is my finished spinner card… there are 4 birthday related sentiments from Deena’s Wheel O’Fortunate Word Art on mine. The gift image is from Deena’s Jolly Holiday Elements which I dressed up with a different paper. I partially embossed my box layer, and added sequins, but you can use whatever you have on hand! This card takes between 45 to 60 minutes to complete.


2 comments:
How FUN Arielle! Love the colorful playful sequins!!
This is awesome! I might CASE this sometime ;)
Post a Comment