Hello! I'm so excited! I was asked recently to do a few tutorials at Just Some Lines, one each month until the new year! For my first project, I wanted to do something a little different - a mixed media canvas! Yes, I know it might seem like a 'scary' project (no pun intended), but it's pretty simple.... I promise! I did a canvas a while back, so this is just my second one. But this is my first "how-to" on completing one. And it takes just a few supplies, most of which you already have! So why don't you give it a whirl!
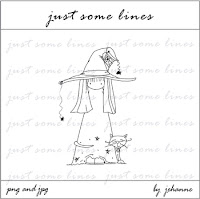
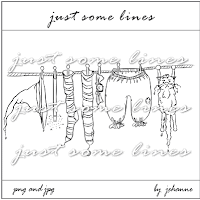
Today I am using these cute images - Little Witch 1 and Getting Ready For Halloween by Just Some Lines.


You'll need:
- a canvas - I used a 3"x3" canvas I got at Michaels.
- printed images
- Copics (or other coloring medium)
- patterned paper
- Mod Podge
- paint brushes
- scissors or X-acto knife
- variuos embellishments
- washi tape (I taped the sides of my canvas)
Now you're ready to go!
Size and print your images to fit your canvas and color them. I used purple in my coloring, so I used that same color on my canvas sides and just a pinch on the front. You could also use paint. I decided the Copic would be faster. These canvases are rarely even, so I color part of the front where my patterned paper won't be covering.
Cut your images out, as well as your other papers. It's better to get everything ready to go before you start! I also cut a moon. My striped paper is 1/8" inch smaller that the height and width of my canvas.
Once everything is ready - apply a generous layer of Mod Podge to your canvas and place your background paper. Make sure to press it down well, then apply more Mod Podge on top and add your next paper layer. You don't have to wait for everything to completely dry before adding new layers. Once I started pasting, it only took about 10 or 15 minutes! Really slather it on and make sure everything sticks. It's important to press the papers down well to make sure there aren't any air pockets before moving on.
Once all your layers are in place, apply another generous coat to the entire canvas. It will dry clear. Then comes the FUN!
As a finishing touch, you can add twine, ribbon, buttons, glitter, rhinestones..... whatever you like. You can add them on top of the wet Mod Podge to help them adhere. You can also Mod Podge over some of the embellishments. You might want to test it before hand, in the case of rhinestones, it might lessen their bling~y~ness. Just experiment and get your hands dirty. Once it dries, you can go back in with paint, markers, stamps... I added some smudges of black paint, and some marker lines to give a little definition to some of the images.
Thanks so much for stopping by, and if you have any questions, please feel free to email me, snappystamper@yahoo.com.
Have an awesome day!


7 comments:
Wow this is amazing!! Thanks for sharing and such wonderful tips! I will have to try this sometime! :)
Hugs,
xx Tracey xx
♥My Blog♥
This is so stinkin' cute Arielle! Awesome tute on how to use Copic colored images in mixed media art. Hugs!
Wowzers Arielle how stinkin fabulous is this!!
Beautiful!! Lee-Ann :)
Amazing project, Arielle!! Love it!! Thanks so much for sharing this fun tut with us!!
Great project - love the texture. Really cute!
WOW Arielle...this is such a cool canvas! I love it! Hugs ~S~
Post a Comment