all challenges foodie design teams digital hybrid tutorials xyz
"For my thoughts are not your thoughts, neither are your ways my ways, saith the Lord. For as the heavens are higher than the earth, so are my ways higher than your ways, and my thoughts than your thoughts. For as the rain cometh down, and the snow from heaven, and returneth not thither, but watereth the earth, and maketh it bring forth and bud, that it may give seed to the sower, and bread to the eater: So shall my word be that goeth forth out of my mouth: it shall not return unto me void, but it shall accomplish that which I please, and it shall prosper in the thing whereto I sent it." ~ Isaiah 55: 8-11

Showing posts with label PandCo. Show all posts

11.07.2014

UNDER THE MISTLETOE / ADFD Nov. Club Kit...


Good morning! Tammy at A Day For Daisies has a gorgeous new Club Kit for November ~ Little Scotty Dogs! I used some digital paper from Scotty Girl Designs, Rudolph. I used Scotty Mistletoe B for my card! I love how he has the mistletoe in his little mouth!


And here's a little freebie of my sentiment:
(just right click on either image below and save the 300 dpi .png or .jpg file to your desktop)...

.jpg ~


.png ~


Have an awesome day!

10.01.2014

FIRST DAY... Maisie / Simple Scrapper & P&Co...


This is the same template from Simple Scrapper's September Premium Membership, that I used for the layout in my previous post! I love that this digital kit Scholastic, by Mommyish (LOVE her!) has some girl~y colors!


Nighty~night!

FIRST DAY... Alex / Simple Scrapper & P&Co...


I used another of Simple Scrapper's September templates for this layout ~ I think it's one of my favorites! (I also used it for Maisie's first day layout.) The digital kit is from Scotty Girl Designs, she has a wonderful style! It's called Brainiac.


Big hugs!

SIMPLY NOSTALGIC / Simple Scrapper & P&Co...


I have very fond memories of shelling peas on the porch of my great grandmother's house. She lived out in the country in a small farmhouse. I loved spending time with her! My Great Uncle grew lots of peas this summer, and we were given some. I taught Maisie how to shell them - she loved it!

This was one of my samples for Simple Scrapper's September templates. I used KimB's Designs kit, Pretty Amazing. It is a really gorgeous kit!


Hugs!

8.31.2014

DIY Quilted Canvas Wall Decor / Pixels and Co...


Hello!  Here's a hybrid tutorial I posted over at Pixels and Company today. I love little “artsy” things, especially little canvases. I have a tutorial today that will show you how to make this little quilted canvas wall decor. It would make such a cute little gift, don’t you think?
What you’ll need…
  • Digital kit & print outs – I used a kit from KimB’s Designs,  Best Medecine
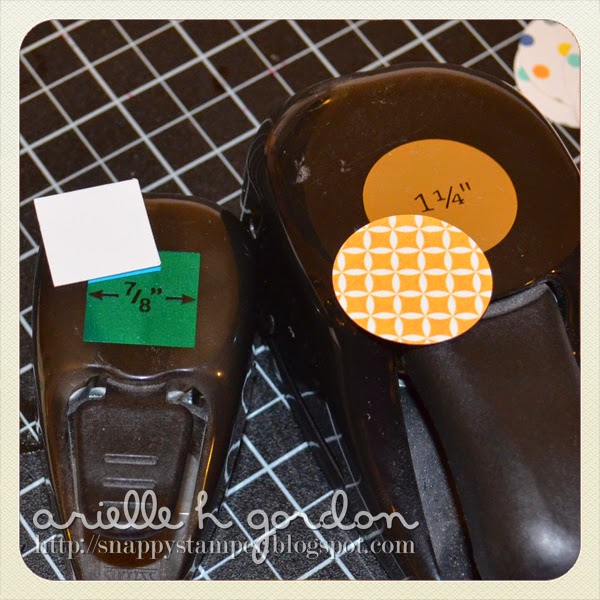
  • Square punch 7/8″ of thick card stock (to use as a template)
  • Circle punch 1 1/4″
  • 4×4″ canvas
  • Buttons or other embellishments
  • Modge Podge
  • paint brushes and paint (optional)
  • washi tape (optional)

Step 1 – Set up your digital prints. I set up a document of my patterned papers in long strips, at least 2 1/8″. I set up an identical page with solid colors, the printed one of each back-to-back. That way my circles would be solid on one side and patterned on the other. I also set up and printed a sentiment and coordinating strip of patterned paper, about 2 1/2 long.


Step 2 – Punch a piece of heavy card stock with the square 7/8″ punch. You will use this as a template to fold your circles. You will need to punch out 13 circles.

Step 3 – Place the square template into the center of each circle and fold the edges over.


Step 4 – Arrange the squares prior to adhering them to you canvas. As you’ll notice, I painted the top of my canvas yellow, but left the sides unpainted. In arranging your squares, remember to plan in a space of 3 consecutive squares, to add your sentiment.

Step 5 – Apply Modge Podge to the back of each square and adhere to the canvas. I adhere the first square to the top left corner, flush with the top and left side. Then I apply the the one assigned to the top right corner, flush with the top and right side. Once they are in place, I can add the middle 2, making sure to space them appropriately. Then adhere the rest.


Step 6 - Apply your sentiment to the empty space and add buttons or other embellishments.

Step 7 - You can see I finished the side with color-coordinating washi tape.


And that’s it – a fun little wall canvas! If you make one of your own, please add a photo of it to the hybrid gallery over at Pixels and Company, and come back and leave a link in the comments – I would love to see it!

Have a great day,

8.18.2014

DECOUPAGED MONOGRAM Hybrid Tutorial for Deena Rutter...


Hello! I wanted to share an easy project and tutorial for this sweet Decoupaged Monogram that I created for Deena Rutter's blog, using some of her gorgeous digital papers and elements. We are doing a Back-To-School series each Monday this month, so be sure to head over to her blog and check out some of the other amazing projects!

This monogram is seriously easy, but looks fabulous and makes an amazing gift!

SUPPLIES:
  • Your digital kits – I used Deena’s Roots and Wings Full Kit 
  • Chipboard or papier-mâché letter
  • Adhesive, I used Modge Podge and glue dots
  • Buttons
  • Scissors and/or a craft knife
  • Sanding tools
  • Ribbon (if you want to hang it)


DIRECTIONS:
Step 1 – Set up your pages of papers and elements and print. I printed the strips of digital patterned paper onto regular copy paper and the elements onto thick card stock. Cut your strips and have them ready to use.
Step 2 – Brush Modge Podge onto the front of the letter and add the paper strips, overlapping them slightly.
Step 3 – Once dry, flip the letter over and trim. You can neaten up the edges with sanding tools.  (At this point I brushed Modge Podge to the papers on the front of the letter to make it shiny and more durable.)

Step 4 – Decorate with your elements and buttons. You can also tie ribbon to the top to hang it.


Bye for now,



8.05.2014

HAPPY CAMPERS / P&Co & Simple Scrapper...


Hello again! This is my second layout showing off this month's templates and Story Starters from Simple Scrapper! Way back before kids, Jeff and I did quite a bit of camping. This trip was back in 2006! We actually took the kids on their first camping trip this past weekend - and we lived to tell the tale!

I used an adorable kit by Scotty Girl Designs called Camp S'more.


Bye for now!

#sogoofy / P&Co & Simple Scrapper...


This is my first layout showing off one of the new Simple Scrapper August 2014 templates, as part of Simple Scrapper's August Community Show and Tell. My sweet little children! It's so great when they are getting on well, they hug and hold hands - but let me tell you, when they are fighting it can get nasty! I included a great quote on the page for them, too - I like to try to add "little messages" to them when I scrap pics of them together like this.
"Siblings are the people we practice on, the people who teach us about fairness and cooperation and kindness and caring - quite often the hard way." ~ Pamela Dugdale
For this layout I used Simple Scrapper's August 2014 template #2. The kit is a collab between Mommyish and Scotty Girl Designs, Q&A.


Thanks for stopping by!

PICNIC WITH A SPLASH / P&Co & Simple Scrapper...


Hello! I've been doing a little scrapping lately - woohoo! We took the kids for a picnic at the local park, which also has a splash pad - they had a blast! And mom and I were pretty tired by the time it was all done - lol!

I used a template from Simple Scrapper's Premium Membership and this sweet kit by Scotty Girl Designs, Color My World Collection.

Hugs!

7.10.2014

HELLO SUMMER Hybrid Treat Box / P&Co Dollar Days...


Hello! I have a little treat box I am showing off today with products from Pixels and Company's Dollar Days - that's right - both of these digital kits were ONE DOLLAR each! I love that when I create a digital file for a hybrid project, I can save it and use it again and again! I printed 2 of the flower, one slightly smaller than the other and rounded the leaves up on the bottom one & down on the top one - then added a real button.

Kits:
Triangle Truffle Box - Kelleigh Ratzlaff Designs
Best Summer Ever | Full Kit - Mommyish


Back in a few!

7.04.2014

YOU ARE MY SUNSHINE / DB Challenge...


Hello! I am playing along today with the newest challenge that will be posting over at Dilly Beans ~ Summer Lovin'! I know - it's been a while! You should come over and play along with us! 

I used the ever adorable image Amalia & Butterflies and did some digital paper piecing, using this kit is by Mommyish and Meghan Mullins called Little Ray of Sunshine.


Have an awesome holiday weekend!

LinkWithin

Related Posts with Thumbnails