Good morning! A week or so ago, I made a little basket out of a brown paper bag, and I thought I'd share this little mini tutorial with you! It's also posted over at
The Pink Elephant blog, along with
some other great tutorials... you should go check it out, after you're finished here, of course!
Honestly if this project took longer than 30 minutes, I'b be shocked! I was actually talking on the phone while I constructed it! Now, you're not going to be able to carry a bowling ball around in this basket, but it could be used for a cute little place card holder, or treat holder! If you want something a little more durable, you could use cardstock.
1 - Start with a brown paper bag that you've cut apart at the seams.
2 - Cut 2 circles, I used a Nestability with a diameter of 3 3/4". The cut 6 strips measuring 6" x 3/4" and one strip measuring 12" x 3/4".
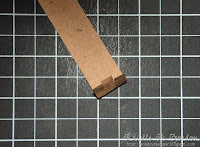
3 - Cut three slits into one end of the 6" strips and both ends of the 12" strip. My slits are about 1/4".
4 - Crease each strip where the slits end.
5 - Apply adhesive to one of the circles. I was in a hurry, so I used my ATG gun... you could also run it through a Xyron.
6 - Adhere the slitted end of one of the short strips to the top of the base circle. The slits will allow you to 'contour' the strip around the edge of the circle. Make sure the crease of your strip is right on the edge of the circle or outside the circle just a pinch.
7 - When you place the 2nd strip, place it directly opposite the first. Continue with all the strips, leaving a space for the longest strip, which will be the handle of the basket.
8 - Place the 2 ends of the 12" strip just like you did the shorter ones.
9 - Spread adhesive on the 2nd circle and then slip it onto the top of the first, sandwiching the ends of the strips.
10 - Now cut 2 strips that are 1/2" x 13" or more. You'll use these to weave around the basket, in and out of the other strips. Start by adhering one end of the strips around the handle, about a 1/4" from the bottom.
11 - I used small adhesive dots and would lift up the side strips as I went along, weaving in and out. Then secure the strip back at the handle where you started and weave the next one. Again, start the second about a 1/4" above the first weave.
12 - Once you've finished the second, trim the ends of the small vertical strips to about a 1/4" - 1/2" above the top weave. I cut mine on a slight diagonal.
13 - Fold the trimmed ends down over the top weave & secure with brads.
Voilà - c'est magnifique!
Here's my finished project from last week. I used the digital stamp set, Harvest from Kathy Martin, who by the way will be sponsoring an upcoming challenge here at the Pink Elephant! YAY! You should go pay Kathy a visit, she's currently having a little give-away on her blog!
If you'd like to see a little more info about my project, please visit that post here!
Bye for now & happy crafting!!!


